
Grilling watermelon? Crazy talk, right?
I must admit I had never thought about grilling watermelon until I came across Jordan’s recipe at her wonderful blog called, The Hungry Traveler. The result was so yummy and unique that I am forced to share it with you. This refreshing salad will make an elegant appetizer or a fanciful side dish to your BBQ party.
If you like discovering the world through one dish at a time, then be sure to visit Jordan’s site at, The Hungry Traveler Blog. She has a plethora of delicious recipes and travel tips to share with you.
Enjoy this recipe and let me know how it turns out ~

Grilled Watermelon Salad
[b]MEAL PAIRING TIP[/b]: [url href=”https://hungrygopher.com/bulgogi-korean-beef-bbq-%eb%b6%88%ea%b3%a0%ea%b8%b0/”]Bulgogi[/url] (Korean Beef BBQ) [br][br] [b]SERVES 6 as an appetizer[/b] [br][br]Active: 15 minutes Total: 1 hour
Ingredients
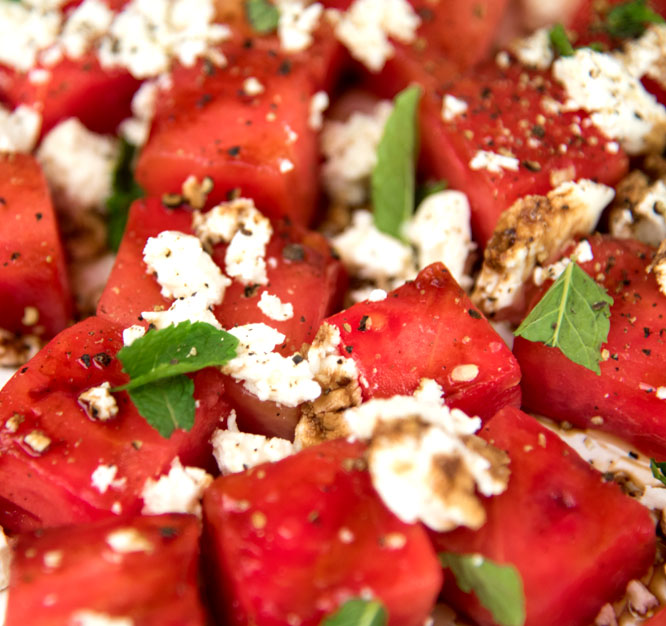
- 6 cups seedless watermelon
- 3/4 cup feta cheese, crumbled
- ¼ cup mint leaves, torn into small pieces
- 2 Tbsp. extra virgin olive oil
- 2 Tbsp. balsamic reduction sauce
- 1/4 tsp. Kosher salt
- 1/4 tsp. black pepper
Instructions
- First, cut a medium sized watermelon in half. Put the flesh side down and slice it crosswise into 1-inch thick piece moons.
- Prepare a hot grill or grill pan. Lightly brush vegetable oil on the grill. Once the grill is very hot, grill the watermelon for 3-4 minutes per side. Transfer the finished melons to a plate and repeat the process with any remaining melon.
- Once the watermelon is cool enough to handle, cut the flesh from the rind and cube it into one inch pieces. Refrigerate the melon for at least 30 minutes, or until chilled through.
- Spread the watermelon out in a single layer across a large plate or platter.
- Distribute the rest of your ingredients over the layer of melon. Start by spreading the feta. Then, drizzle the olive oil followed by the balsamic reduction. Next, top with a healthy amount of hand torn mint leaves. Lastly, season with salt and pepper.
- Serve and enjoy ^^